Perfect Homemade Rotisserie Chicken Recipe: Crispy Skin, Juicy Meat Every Time
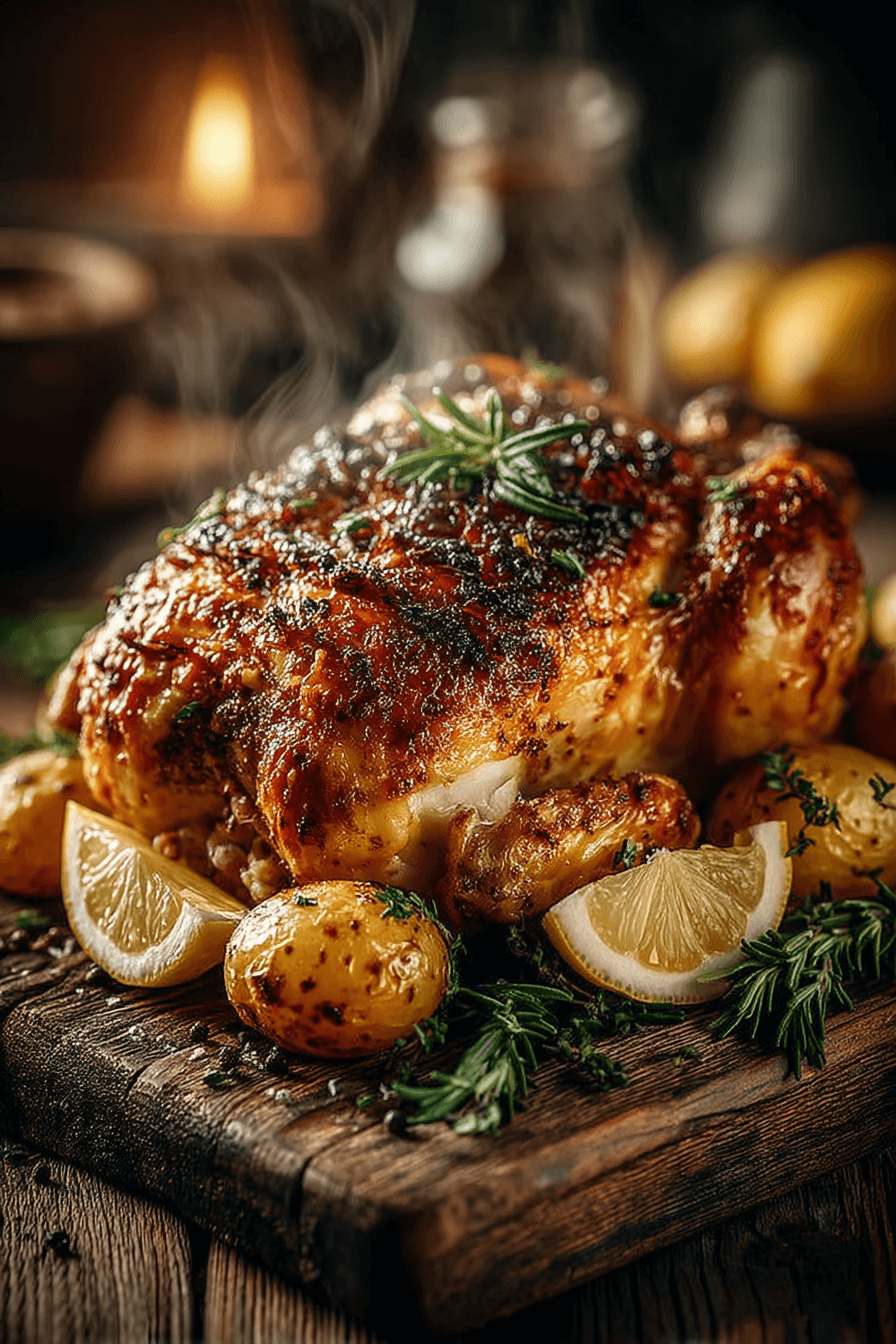
There’s something almost magical about a perfectly roasted rotisserie chicken—that golden, crackling skin giving way to impossibly tender, juicy meat that practically falls off the bone. For years, I’d grab one from the grocery store every week, telling myself it was “just easier.” Then one Sunday afternoon, when my usual store was sold out by 2 PM (again), I decided to stop making excuses and figure out how to make it myself.
That first attempt? Let’s just say the smoke alarm got involved, and my chicken looked more like it had survived a battle than a roasting process. But something clicked that day. I realized that rotisserie chicken isn’t actually complicated—it’s just about understanding a few key techniques. Now, several years and probably a hundred chickens later, I’ve perfected a recipe that delivers that same crispy-skinned, fall-apart-tender chicken you’d grab from the store, except it tastes even better because you know exactly what went into it.
The secret isn’t fancy equipment or complicated techniques. It’s about the right blend of everyday spices, a little patience, and understanding how to let the oven (or slow cooker, or actual rotisserie if you have one) work its magic. This chicken has become my Sunday tradition—one bird for dinner, and the leftovers stretch into chicken salad, soup, quesadillas, and whatever else the week demands. Let me show you how easy it really is.
Prep Time / Cook Time / Total Time
Prep Time: 15 minutes (plus optional marinating time)
Cook Time: 70-90 minutes (oven method)
Resting Time: 10 minutes
Total Time: Approximately 1 hour 45 minutes
Yield: Serves 4-6 people
Cuisine: American
Why This Rotisserie Chicken Recipe Works
Before I dive into the recipe, let me explain what makes this version special. I’ve tested dozens of rotisserie chicken recipes—some too complicated, others too bland, and many that produced dry, disappointing meat despite following the instructions precisely.
This recipe works because:
The spice blend is perfectly balanced. Store-bought rotisserie chickens get their distinctive flavor from a specific combination of paprika, garlic, onion, and herbs. I’ve reverse-engineered that blend, and it’s shockingly simple. No weird ingredients you’ll never use again—just everyday spices that probably already live in your pantry.
Multiple cooking methods mean anyone can make it. Whether you have an actual rotisserie, a standard oven, a slow cooker, or even an air fryer, I’ll walk you through how to adapt this recipe for your equipment. The seasoning stays the same; only the cooking method changes.
The technique keeps the chicken juicy. Dry chicken is tragic, and I refuse to serve it. Through trial and error (okay, mostly error at first), I learned that proper seasoning under the skin, letting the bird come to room temperature before cooking, and knowing exactly when to pull it from the heat are what separate okay chicken from extraordinary chicken.
It’s actually foolproof. I mean it. My neighbor, who claimed she “couldn’t cook to save her life,” followed this recipe and texted me a photo of the most beautiful golden chicken I’d ever seen. If she can do it, anyone can.
Ingredients
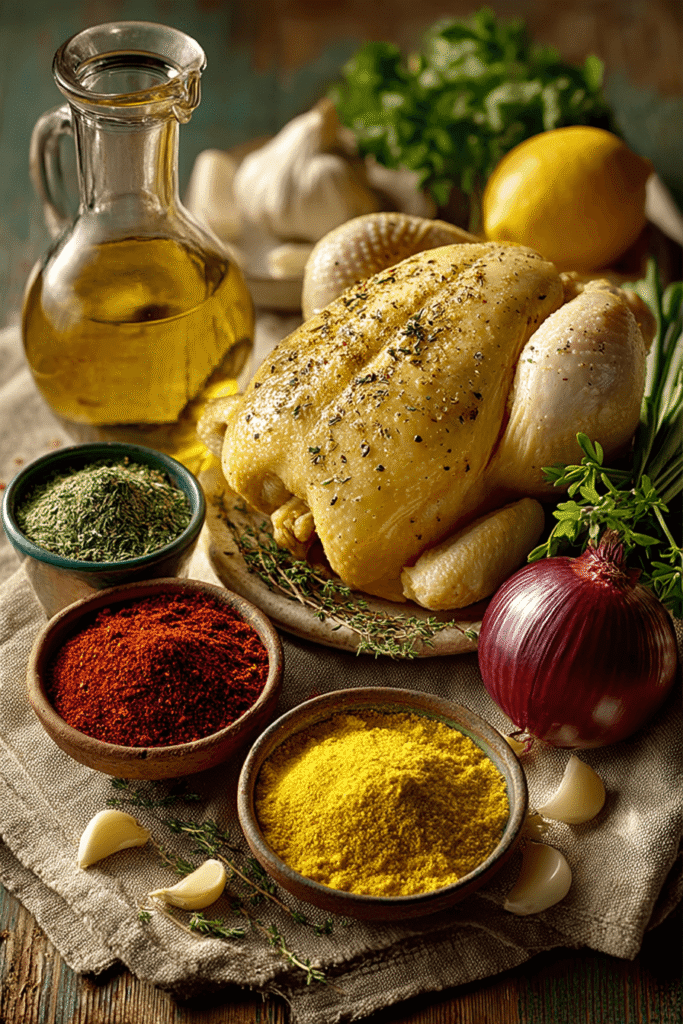
For the Rotisserie Chicken Seasoning
This makes enough for about 2-3 chickens, so you can store the extra in your pantry for next time:
- 2 tablespoons paprika (regular or smoked—I prefer smoked for deeper flavor)
- 1 tablespoon garlic powder (not garlic salt)
- 1 tablespoon onion powder
- 2 teaspoons dried thyme (if yours is old, crush it between your fingers to release the oils)
- 1 tablespoon kosher salt (or 2 teaspoons table salt—kosher’s flakes distribute better)
- 2 teaspoons freshly ground black pepper
- 1 teaspoon dried sage (optional, but adds wonderful earthiness)
- ½ teaspoon cayenne pepper (optional—add only if you like a subtle kick)
For the Chicken
- 1 whole chicken (4-5 pounds—look for one labeled “roasting chicken” for best results)
- 2-3 tablespoons olive oil (or melted butter for richer flavor)
- 1 medium onion, quartered (to stuff the cavity—keeps things moist)
- Optional aromatics: 1 lemon (halved), 4-5 garlic cloves (smashed), fresh herb sprigs (rosemary, thyme, or parsley)
Equipment You’ll Need
- Roasting pan with a wire rack (the rack is crucial for air circulation)
- Kitchen twine for trussing (sounds fancy, takes 30 seconds)
- Instant-read meat thermometer (non-negotiable for perfect results)
- Small bowl for mixing spices
- Paper towels (lots of them—drying the skin is essential)
- Basting brush (or your hands work fine)
Step-by-Step Instructions
Step 1: Prepare Your Rotisserie Seasoning (5 minutes)
In a small bowl, whisk together the paprika, garlic powder, onion powder, thyme, salt, pepper, sage, and cayenne if using. Give it a good mix to ensure there are no clumps—you want every bit of that chicken evenly seasoned.
Storage tip: Make a triple batch and store it in a small mason jar in your pantry. It’ll keep for 6 months to a year, and you’ll have it ready whenever you need it. Label it “Rotisserie Magic” or something equally dramatic so you remember what it is.
Step 2: Prep the Chicken (10 minutes)
Pull your chicken out of the fridge at least 30 minutes before cooking—bringing it closer to room temperature ensures even cooking. Meanwhile, preheat your oven to 425°F (220°C) if using the oven method.
Now for the important part: dry that bird like your dinner depends on it (because it does). Remove the giblets from the cavity—they’re usually in a paper or plastic bag inside. Save them for stock if you’re feeling ambitious, or discard them. Pat the entire chicken dry with paper towels, inside and out. Get into all the crevices. The drier the skin, the crispier it’ll get. This is the single most important step for crispy skin, and I cannot stress it enough.
Step 3: Season Like You Mean It (5 minutes)
Here’s where the magic happens. Drizzle or brush about 1-2 tablespoons of olive oil all over the chicken’s skin. This helps the seasoning stick and promotes browning.
Now, use about 2-3 tablespoons of your rotisserie seasoning (save the rest for later chickens). Sprinkle it generously over the outside of the chicken—don’t be shy. But here’s my secret weapon: season under the skin too.
Using your fingers, gently loosen the skin from the breast meat. Start at the neck end and carefully work your fingers between the skin and meat, creating a pocket. Be gentle—you don’t want to tear the skin, but it’s more resilient than you think. Slide about 1 tablespoon of seasoning under the skin directly onto the breast meat. This seasons from the inside out and keeps the breast incredibly moist.
Sprinkle some seasoning inside the cavity as well, then stuff it with the quartered onion and any optional aromatics you’re using. The onion releases moisture as it cooks, creating steam that keeps the chicken juicy.
Step 4: Truss the Chicken (2 minutes)
Don’t skip this! Trussing sounds fancy, but it’s just tying the legs together with kitchen twine. This helps the chicken cook evenly and keeps the legs from splaying out awkwardly. Simply cross the legs and tie them together with a piece of twine, making sure they’re snug against the body. Tuck the wings underneath the chicken so they don’t burn. That’s it—you’re done trussing.
Step 5: Choose Your Cooking Method
Now comes the fun part. I’ll give you instructions for multiple methods because not everyone has the same equipment.
Oven Method (My Most-Used Method)
This is how I cook rotisserie chicken 90% of the time because most people have an oven, and it gives you that crispy, golden skin without special equipment.
- Place a wire rack in a roasting pan. This is crucial—it allows air to circulate all around the chicken, so you get crispy skin on all sides without flipping.
- Place the seasoned chicken on the rack, breast side up.
- Roast at 425°F (220°C) for 70-90 minutes, depending on the size of your chicken. Here’s the critical part: baste the chicken every 15-20 minutes with the pan juices that collect in the bottom. Use a basting brush or a spoon to ladle those juices over the bird. This keeps the skin from burning in that high heat while adding layers of flavor.
- The chicken is done when an instant-read thermometer inserted into the thickest part of the thigh (not touching bone) reads 165°F (74°C). The breast should also be 165°F, and the thigh can go as high as 175-180°F for even more tender dark meat.
- If the skin starts getting too dark before the chicken is fully cooked, tent it loosely with aluminum foil for the remaining cooking time.
Slow Cooker Method (The Most Hands-Off)
Perfect for those days when you want to set it and forget it. The only downside? The skin won’t get crispy, but the meat will be incredibly tender.
- After seasoning the chicken, place it in your slow cooker. It should fit snugly but not be crammed in—if your chicken is too large, save this method for a smaller bird.
- Cook on HIGH for 3-4 hours or LOW for 6-8 hours. No need to add liquid—the chicken creates its own as it cooks.
- Check the internal temperature with a thermometer. Once it hits 165°F, it’s done.
Crispy skin hack: If you want crispy skin even from the slow cooker, transfer the cooked chicken to a baking sheet and broil on high for 3-5 minutes, watching carefully so it doesn’t burn.
Actual Rotisserie Method (If You Have One)
If you’re lucky enough to own a rotisserie attachment for your grill or a countertop rotisserie oven, this is the most authentic way to cook rotisserie chicken.
- After seasoning, thread the rotisserie skewer (spit rod) through the chicken lengthwise, making sure it’s centered so it rotates evenly. Secure it tightly with the prongs that came with your rotisserie.
- Set up your rotisserie according to the manufacturer’s instructions. For most grills, this means heating the back burner and turning off the burners directly under the chicken so you’re cooking with indirect heat.
- Cook for about 60-75 minutes, or until the internal temperature reaches 165°F. The rotation automatically bastes the chicken, so you don’t need to do anything—just watch that beautiful bird spin.
Air Fryer Method (For Smaller Chickens)
If you have a larger air fryer with a rotisserie function, this works beautifully for chickens up to about 4 pounds.
- Place the seasoned chicken in the air fryer basket, breast side down.
- Set the temperature to 350°F (175°C) and cook for 60 minutes.
- Carefully flip the chicken so it’s breast side up, and cook for another 15 minutes.
- Check the temperature—you’re looking for 165°F in the thickest part of the breast and thigh.
Step 6: The Crucial Resting Period (10 minutes)
When your chicken hits 165°F, resist the urge to carve into it immediately. I know it’s hard—it smells incredible, you’re hungry, and it looks perfect. But if you cut into it right away, all those precious juices will run out onto your cutting board instead of staying in the meat.
Transfer the chicken to a cutting board and tent it loosely with aluminum foil. Let it rest for 10 minutes. During this time, the juices redistribute throughout the meat, and the internal temperature actually continues to rise a few degrees (carryover cooking). This is what separates juicy chicken from dry chicken.
Step 7: Carve and Serve
After resting, carve the chicken. Start by removing the legs and thighs, then the wings, and finally slice the breast meat. Don’t forget to scrape up all those crispy browned bits from the bottom of the pan—that’s pure flavor concentrate.
Tips & Variations for Perfect Rotisserie Chicken Every Time
Make-Ahead Strategy
You can season the chicken up to 24 hours in advance. In fact, I often prefer doing this. Season the bird, cover it loosely with plastic wrap, and refrigerate overnight. The seasoning has more time to penetrate the meat, resulting in even deeper flavor. Just remember to let it sit at room temperature for 30 minutes before cooking.
How to Tell When It’s Done Without a Thermometer
While I strongly recommend using a thermometer, if you don’t have one, here are backup indicators:
- The juices run clear (not pink) when you pierce the thigh with a knife
- The leg jiggles easily and feels loose when you wiggle it
- The meat has pulled back from the end of the drumstick bones
- No pink remains when you cut into the thickest part of the thigh
Scaling the Recipe
Cooking two chickens? The baking time stays almost the same. Add maybe 5-10 minutes, but check the temperature to be sure.
Have a smaller 3-pound chicken? Reduce cooking time to 50-60 minutes at 425°F.
Larger 6-pound chicken? Increase to 90-100 minutes and consider reducing oven temperature to 400°F to prevent over-browning.
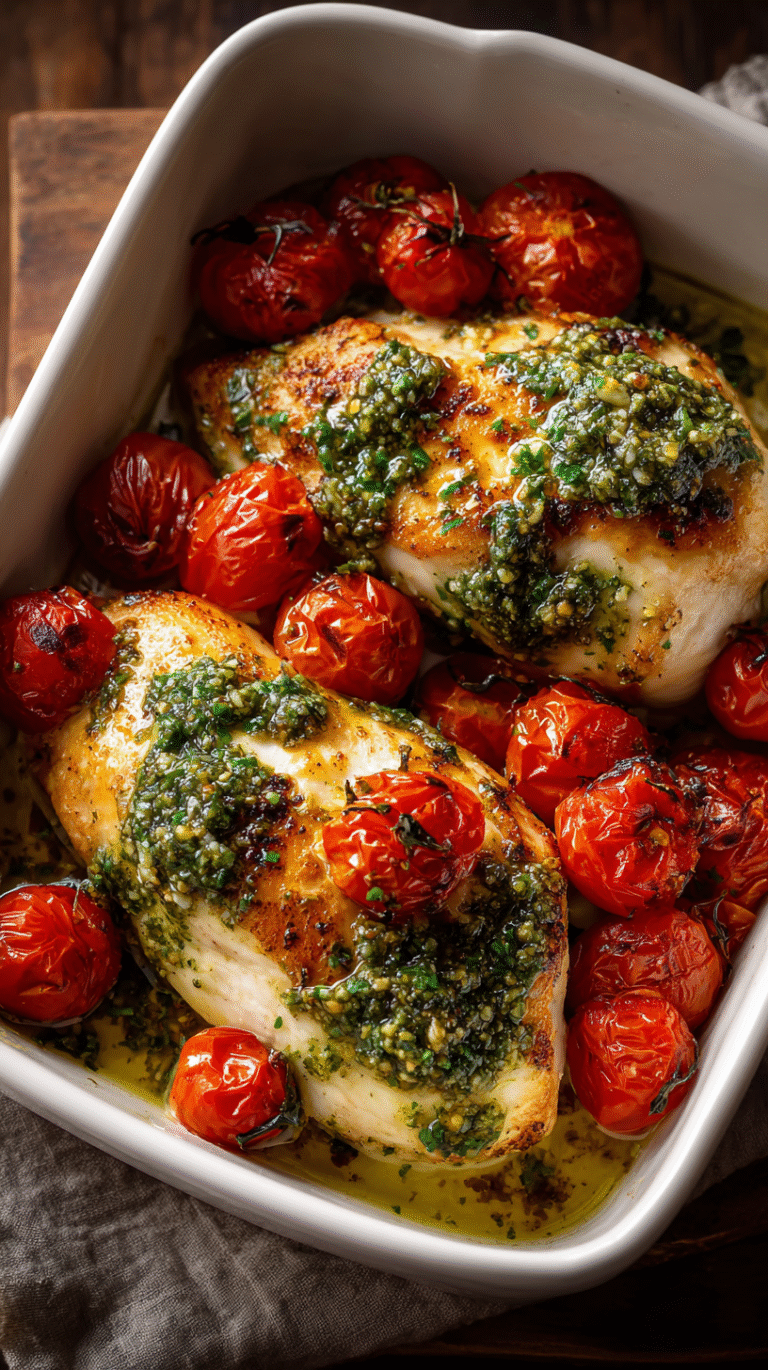
Flavor Variations
The base recipe is classic rotisserie flavor, but you can easily customize it:
Lemon-Herb: Add 2 teaspoons lemon zest to your spice blend and stuff the cavity with lemon halves and fresh rosemary.
Spicy Southwest: Use chipotle powder instead of regular paprika, add 1 teaspoon cumin, and stuff the cavity with jalapeño halves and cilantro stems.
Mediterranean: Add 1 tablespoon dried oregano to the spice blend, use lemon juice mixed with olive oil for rubbing, and stuff with lemon quarters and fresh thyme.
Asian-Inspired: Mix 1 tablespoon of your spice blend with 2 tablespoons soy sauce and 1 tablespoon honey for the rub. Stuff with ginger slices and green onions.
Storage and Food Safety
Refrigeration: Let the chicken cool to room temperature (but don’t leave it out for more than 2 hours). Store in an airtight container in the refrigerator for 3-4 days. I like to shred or slice all the meat off the bones right away—it takes up less space and makes it easier to use in other recipes throughout the week.
Freezing: Cooked chicken freezes beautifully for 2-4 months. I portion it into 1-2 cup servings in freezer bags, press out all the air, and freeze flat so they stack neatly. Label with the date. To use, thaw overnight in the refrigerator.
The Bones Are Gold: Don’t throw away that carcass! Put it in a large pot or slow cooker with water, celery, carrots, onion, and any leftover herbs. Simmer for 4-8 hours, strain, and you’ll have incredible homemade chicken stock. It’s richer than anything you can buy, and it’s basically free.
Common Mistakes to Avoid
Not drying the skin. I’ve said it before, but it bears repeating: moisture is the enemy of crispy skin. Pat that bird dry until your paper towels come away barely damp.
Skipping the basting. Those 15-minute basting intervals might seem annoying, but they’re what keep the chicken from drying out or burning at high heat.
Cutting too soon. I get it—you’re hungry. But slicing into chicken before it rests releases all the moisture. Just wait the 10 minutes. Check your phone, set the table, whatever you need to do to resist.
Overcrowding the pan. If you’re cooking two chickens, make sure they’re not touching. They need space for the hot air to circulate.
Using wet ingredients in the cavity. While aromatics like onions, lemon, and garlic are great, don’t add wet ingredients like marinades or broth to the cavity. They’ll steam the chicken from the inside, making the skin soggy.
What to Serve With It
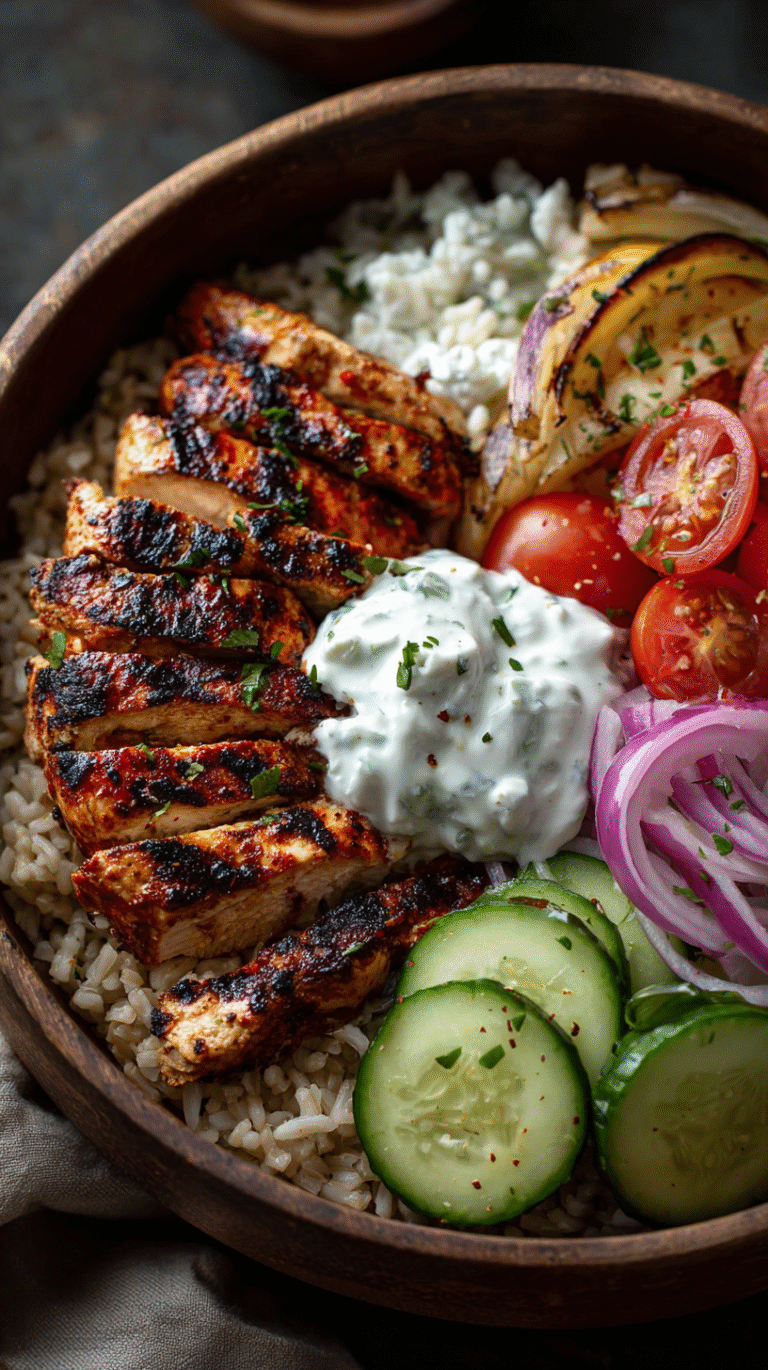
Rotisserie chicken is incredibly versatile, but here are my favorite sides:
Classic: Roasted potatoes and carrots (toss them with olive oil and throw them in the roasting pan during the last 40 minutes of cooking—they’ll cook in the chicken drippings)
Light and Fresh: Simple green salad with lemon vinaigrette, steamed green beans with garlic
Comfort: Mashed potatoes, roasted Brussels sprouts, mac and cheese
Summer: Grilled corn on the cob, coleslaw, sliced tomatoes with basil
Nutrition Facts (Per Serving)
Based on ¼ of a 4-pound chicken (approximately 4 ounces of meat):
- Calories: 180-220 (depending on dark vs. white meat and whether you eat the skin)
- Protein: 28-30g
- Fat: 7-12g (mostly from the skin)
- Carbohydrates: 0g
- Sodium: 450-550mg (from the seasoning)
- Cholesterol: 85-95mg
Note: These values are approximate and vary based on the size of your chicken, how much skin you eat, and whether you use butter or olive oil. Rotisserie chicken is naturally:
- High in protein (great for muscle maintenance and satiety)
- Low in carbs (perfect for keto, paleo, or low-carb diets)
- Naturally gluten-free and dairy-free (if you use olive oil instead of butter)
Removing the skin significantly reduces calories and fat while keeping the protein high—a 4-ounce serving of skinless breast meat has only about 165 calories and 3.5g of fat.
The Real Reason This Recipe Matters
Here’s the thing about making your own rotisserie chicken: it’s not really about saving money, though you absolutely do (a whole chicken costs less than a pre-cooked one, and you control the ingredients). It’s not even just about the superior flavor, though that’s undeniable.
It’s about the feeling of pulling a perfectly golden, aromatic chicken from your oven and knowing you made that. It’s the satisfaction of your family’s faces when they smell it cooking. It’s having a whole week’s worth of meals at your fingertips because you took an hour and a half on Sunday to roast a bird.
The first time I made this recipe successfully—crispy skin, juicy meat, that perfect rotisserie flavor—I felt like I’d leveled up as a cook. It wasn’t fancy or complicated, but it was real cooking. The kind that nourishes people and makes a house smell like a home.
Now, rotisserie chicken is my secret weapon. Bad day? Roast a chicken—it’s impossible to feel stressed while basting something that smells that good. Friends coming over last-minute? Roast a chicken and toss together a salad. Need to meal-prep for the week? One chicken gives you lunch for days.
I’m not going to tell you this will change your life. But it might change your Sunday dinners. And your Monday lunches. And your Wednesday’s “what the heck do I make for dinner” panic. Start there and see what happens.
Frequently Asked Questions
Why is my rotisserie chicken dry?
The most common reasons are overcooking (always use a thermometer and pull it at exactly 165°F), not basting during high-heat cooking, or cutting into it before it’s rested. Another issue can be starting with a chicken that’s too cold—let it sit at room temperature for 30 minutes before cooking so it cooks evenly. Finally, if you’re cooking at too low a temperature for too long, it can dry out. The combination of high heat and regular basting is what keeps it moist.
Can I use chicken breasts or thighs instead of a whole chicken?
Absolutely! This seasoning blend works beautifully on chicken pieces. For bone-in pieces, reduce cooking time to 35-45 minutes at 425°F. For boneless pieces, check them after 25-30 minutes. Chicken thighs are more forgiving and stay juicier, while breasts dry out faster, so watch them carefully. The dark meat gives you more of that classic rotisserie flavor.
How do I get crispier skin?
Four secrets: First, dry the skin thoroughly with paper towels before seasoning—moisture prevents crisping. Second, cook at a high temperature (at least 400-425°F). Third, use a wire rack so air circulates all around the chicken. Fourth, if your skin isn’t crispy enough at the end, turn on the broiler for 2-3 minutes, watching very carefully so it doesn’t burn. You can also finish it under the broiler for extra crispiness.
Is rotisserie chicken seasoning the same as poultry seasoning?
Not quite. Poultry seasoning is usually a blend of sage, thyme, marjoram, rosemary, and sometimes nutmeg—herbs that complement poultry. Rotisserie chicken seasoning includes those herbs but adds paprika, garlic powder, and onion powder, which give it that distinctive savory, slightly smoky flavor you recognize from store-bought rotisserie chickens. They’re related but distinct.
What’s the difference between a roasting chicken and a fryer chicken?
Roasting chickens (sometimes called “roasters”) are older birds, usually 5-7 pounds, with more fat and richer flavor. They’re ideal for slow-roasting methods. Fryer chickens are younger, smaller (2.5-4.5 pounds), and leaner, which makes them good for faster cooking methods. For rotisserie-style cooking, either works, but roasters give you juicier, more flavorful results. Most grocery store whole chickens are fryers, and they work perfectly fine for this recipe.
Can I stuff my rotisserie chicken with traditional bread stuffing?
I don’t recommend it for food safety reasons. Stuffing inside a chicken needs to reach 165°F just like the meat, but by the time the stuffing reaches that temperature, your chicken is often overcooked and dry. Instead, cook your stuffing separately and use aromatics (onions, lemons, garlic, herbs) in the cavity for flavor. They perfume the meat from the inside without the food safety concerns.
How long can I keep rotisserie chicken in the fridge?
Properly stored in an airtight container, cooked rotisserie chicken stays good for 3-4 days in the refrigerator. I always shred or slice the meat off the bones right away—it stays fresher longer that way and takes up less space. If you notice any off smell or slimy texture, discard it. For longer storage, freeze it for up to 4 months.