The Best Dutch Oven Beef Stew You’ll Ever Make
There’s something magical about the way a Dutch oven transforms simple ingredients into pure comfort. This beef stew recipe has become my cold-weather obsession—the kind of meal that fills your kitchen with the most incredible aroma and makes everyone ask “what’s cooking?” the moment they walk through the door.
What makes this stew special isn’t just one thing. It’s the way the beef becomes so tender it practically melts on your tongue. It’s how the vegetables soak up all that rich, savory broth. And honestly? It’s the fact that your Dutch oven does most of the heavy lifting while you curl up with a good book or tackle that pile of laundry.
I’ve made this recipe more times than I can count, and each time I’m reminded why it’s worth the wait. The secret is in the searing—getting that gorgeous caramelized crust on the beef before it goes into the oven. Those browned bits stuck to the bottom of your pot? That’s liquid gold, my friend. That’s where all the depth and richness comes from.
Perfect for Sunday dinners, meal prep, or those days when you need something warm and nourishing without much fuss. Plus, it tastes even better the next day, which in my book makes it the ultimate make-ahead meal.
Time Information
Prep Time: 25 minutes
Cook Time: 2 hours 45 minutes
Total Time: 3 hours 10 minutes
Servings: 6-8
Ingredients
For the Beef:
- 3 pounds beef chuck roast, cut into 1½-inch cubes
- 3 tablespoons all-purpose flour (plus extra for dusting)
- 2 teaspoons kosher salt
- 1 teaspoon freshly ground black pepper
- 3 tablespoons olive oil (divided)
For the Stew Base:
- 1 large yellow onion, diced
- 4 cloves garlic, minced
- 2 tablespoons tomato paste
- 1 tablespoon balsamic vinegar
- 1 cup dry red wine (Cabernet Sauvignon or Merlot work beautifully—use something you’d drink!)
- 4 cups beef broth (low-sodium preferred)
- 2 bay leaves
- 4 sprigs fresh thyme (or 1 teaspoon dried)
- 1 tablespoon Worcestershire sauce
For the Vegetables:
- 1 pound baby potatoes (or Yukon Gold, cut into 1½-inch chunks)
- 4 large carrots, peeled and cut into 1-inch pieces
- 3 celery stalks, cut into 1-inch pieces
- 1 cup frozen peas (optional, but I love the pop of sweetness)
- Fresh parsley, chopped (for serving)
Substitution Notes: Don’t have wine? Use extra beef broth plus 2 tablespoons of red wine vinegar—you need that acidity to balance everything out. Gluten-free? Swap the flour for your favorite GF blend or use cornstarch for thickening at the end.
Instructions
Step 1: Prep Your Beef
Pat the beef cubes completely dry with paper towels. This is crucial—wet meat steams instead of sears, and we want that beautiful brown crust. Season generously with salt and pepper, then toss with 2 tablespoons of flour until lightly coated. Shake off any excess.
Step 2: Sear the Beef (Don’t Skip This!)
Preheat your oven to 325°F. Heat 1 tablespoon of olive oil in your Dutch oven over medium-high heat until it’s shimmering. Add beef in batches—and I mean it, work in batches! Overcrowding the pan will steam your meat instead of searing it. Let each batch sit undisturbed for about 5 minutes until a deep golden crust forms, then turn and brown the other sides. Transfer browned beef to a plate and repeat with remaining batches, adding more oil as needed.
Pro tip: If the fond (those gorgeous brown bits) starts to get too dark, deglaze with a splash of broth and pour it over your beef. Those flavors are too precious to lose!
Step 3: Build Your Flavor Base
Reduce heat to medium. In the same pot (don’t wipe it out—those browned bits are flavor!), add the diced onion. Cook for about 5 minutes, stirring and scraping up all those beautiful caramelized bits from the bottom. The onions will soften and become translucent. Add the garlic and cook for another minute until fragrant.
Stir in the tomato paste and let it cook for about 2 minutes—it’ll darken slightly and develop this incredible sweet-savory depth. Pour in the balsamic vinegar and use your wooden spoon to really scrape up anything stuck to the bottom.
Step 4: Add Liquids and Braise
Return the beef (and any accumulated juices) to the pot. Sprinkle with the remaining tablespoon of flour and stir for about a minute until it’s incorporated. Pour in the red wine and beef broth, add the Worcestershire sauce, then nestle in your bay leaves and thyme sprigs.
Bring everything to a gentle simmer, then cover your Dutch oven with its lid and transfer it to the preheated oven. Set a timer for 1 hour and 30 minutes.
Step 5: Add the Vegetables
After that first hour and a half, the beef should be getting tender but not quite falling apart yet. Stir in your potatoes, carrots, and celery. Return the covered pot to the oven for another 1 hour, or until the vegetables are tender and the beef is fork-tender and practically melting.
Step 6: Finish and Serve
Fish out the bay leaves and thyme sprigs. If you added peas, stir them in now and let them warm through for about 3 minutes. Taste and adjust seasoning—this is where you might need an extra pinch of salt or a crack of pepper.
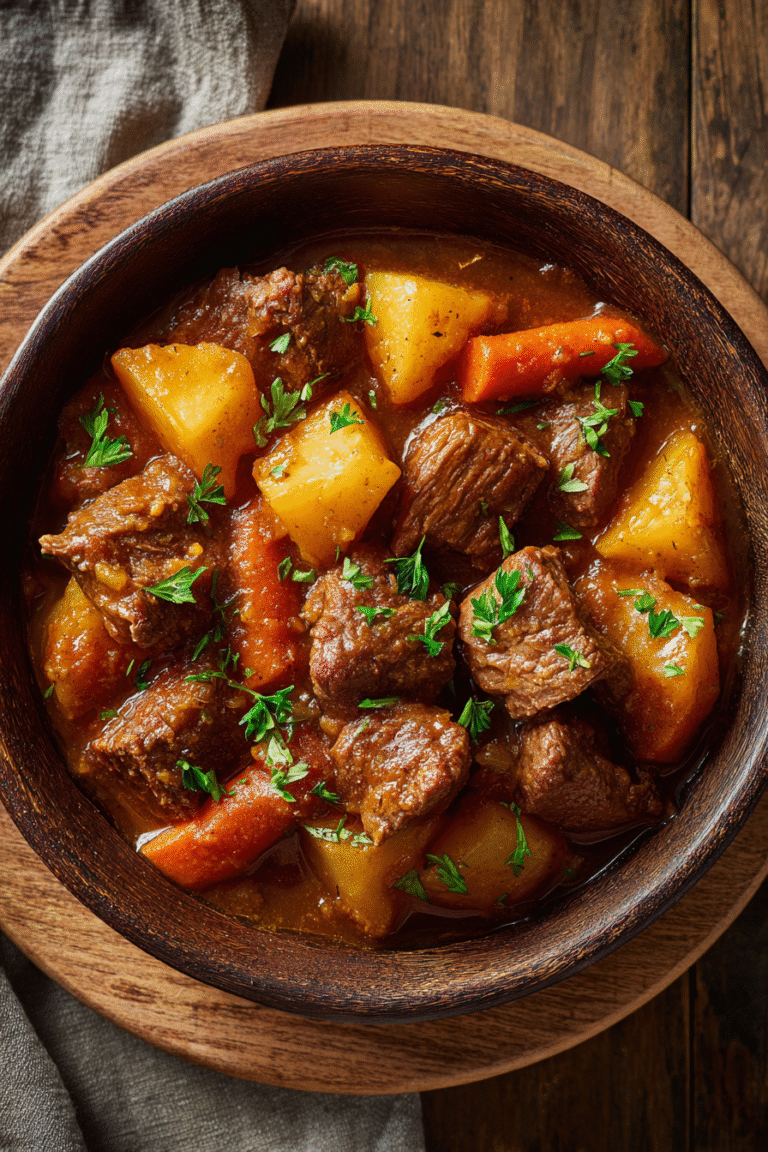
Ladle into deep bowls, top with fresh parsley, and serve with crusty bread for soaking up all that incredible gravy.
Tips & Variations
Make It Your Own:
- Red wine substitute: Use beef broth with a couple tablespoons of red wine vinegar, or try dark beer (like Guinness) for an Irish twist
- Chuck roast is king: Seriously, don’t buy pre-cut “stew meat” if you can help it. Chuck roast has better marbling and more flavor. Cut it yourself into even pieces.
- Veggie swap: Add mushrooms for earthiness, parsnips for sweetness, or skip the celery if it’s not your thing
- Stovetop version: Keep it on low heat on the stove instead, simmering gently for 2½-3 hours with the lid on
Storage Tips:
- Refrigerator: Store in an airtight container for up to 4 days. The flavors meld beautifully overnight—this is genuinely better the next day!
- Freezer: Cool completely, then freeze in portions for up to 3 months. I like to freeze it after the first braise (before adding vegetables) to prevent mushy veggies upon reheating.
- Reheating: Warm gently on the stovetop over medium-low heat, stirring occasionally. Add a splash of broth if it’s gotten too thick.
Chef’s Notes: I can’t stress enough how important it is not to rush the searing. I know it feels tedious when you’re browning meat in three separate batches, but that caramelization is what separates an okay stew from an absolutely stellar one. Also, resist the urge to crank up the oven temperature to speed things up. Low and slow is what breaks down all that connective tissue in the chuck roast and makes it melt-in-your-mouth tender.
Nutrition Facts (Per Serving, Based on 8 Servings)
Approximate values
- Calories: 425
- Protein: 35g
- Fat: 18g
- Saturated Fat: 6g
- Carbohydrates: 28g
- Fiber: 4g
- Sodium: 620mg
- Potassium: 1100mg
Why This Recipe Works (And Why You’ll Love It)
Here’s what I’ve learned after making this stew countless times: the magic is in the method, not just the ingredients. When you take time to properly sear your beef, you’re creating what French chefs call “fond”—those crusty brown bits that form on the bottom of the pan. That’s not just stuck-on food; that’s concentrated flavor that gets incorporated into your broth when you deglaze.
The Dutch oven itself is a game-changer too. Its thick walls and tight-fitting lid create this perfect low-heat environment where everything just slowly melds together. The beef becomes tender without drying out, the vegetables cook through without turning to mush, and the broth reduces down to this rich, almost velvety consistency.
I love serving this with a really crusty sourdough or homemade dinner rolls—something sturdy enough to sop up every last drop of that gravy. A simple green salad on the side cuts through the richness beautifully, though honestly, this stew is hearty enough to stand on its own.
One thing I always tell people: don’t be afraid to make this your own. My mom adds a handful of pearl barley for extra heartiness. My best friend swears by adding a parsnip or two. Some folks like their stew thick and almost gravy-like, while others prefer it brothier. After you’ve made it once as written, feel free to adjust to your taste!
Frequently Asked Questions
Can I make this in a slow cooker instead?
Absolutely! Brown the beef and sauté the aromatics on the stovetop first (this step is important—don’t skip it), then transfer everything to your slow cooker. Cook on LOW for 7-8 hours or HIGH for 4-5 hours. Add the vegetables during the last 1-2 hours so they don’t get mushy. The oven method gives you better flavor development, but the slow cooker works when you need a true set-it-and-forget-it meal.
What’s the best cut of beef for stew?
Chuck roast, hands down. It’s got beautiful marbling and plenty of connective tissue that breaks down during slow cooking, keeping the meat juicy and tender. Avoid lean cuts like sirloin or round—they’ll turn tough and dry. If the butcher asks, you want a boneless chuck roast that you’ll cut into cubes yourself. Pre-packaged “stew meat” can be hit-or-miss since it’s often from various cuts.
How do I thicken my beef stew if it’s too thin?
A few options: First, let it simmer uncovered on the stovetop for 10-15 minutes to reduce naturally. Or, make a cornstarch slurry (equal parts cornstarch and cold water) and stir it in gradually until you reach your desired consistency. My preferred method? Let the potatoes do the work—as they cook, they’ll release starch that naturally thickens the stew. If you want it even thicker, mash a few of the cooked potato chunks against the side of the pot.
Do I really need to use wine?
While wine adds incredible depth and complexity, you can absolutely skip it. Replace it with additional beef broth plus 2 tablespoons of red wine vinegar or balsamic vinegar—you need that acidity to balance the richness and help tenderize the meat. Some folks use dark beer (especially Guinness) with great results too.
Can I prep this ahead of time?
Yes! You can brown the meat and prep all your vegetables the day before, storing them separately in the fridge. When you’re ready to cook, just continue from step 3. Alternatively, make the entire stew, let it cool, and refrigerate. It actually tastes better the next day after all the flavors have had time to meld. Reheat gently on the stovetop, adding a splash of broth if needed.